
How to Reupholster A Tractor Seat | A Step By Step Guide

Affiliate Disclosure
“As an Amazon Associate, I earn from qualifying purchases.”
Getting your tractor seat reupholstered at the local upholster shop will cost you handsome money. Depending on your seat and design it might be $100 to $600. Now you can imagine how much you can save by upholstering the tractor seat of your own. Not only will it saves you big bucks but also it is a fun activity that will stimulate you and your innovative juices in motion.
This article is a step-by-step guide wrapped up with invaluable tips on how to reupholster your tractor seat like a pro. After reading this article, I guarantee you have gained the expert knowledge you require to have the job done perfectly. So read this post as I take you through this innovative journey.
Steps to reupholster a tractor seat
Reupholstering your tractor seat is a process that you can do yourself in the comfort of your garage or backyard. It is also an exciting activity you can do with friends or family to spend quality time together. With the guidance of these few steps, you will have your tractor seat looking brand new in no time. If you think otherwise about getting a new tractor seat don’t miss our tractor seat review guide.
Step 1 – Gather your tools.
The initial thing you need to do before doing anything else is to gather all the tools you will need to use in the process. The last thing you need is to put your work on hold while you run around to find a missing tool. Therefore, save yourself the hustle and time by collecting all the tools together first.
Below is a checklist of all the things you will need. Make use of it to make sure you have all you need handy.
Materials you will need:
-
Screwdriver
-
Cleaning material (cloth and water)
-
Drill or scraper
-
Electronic knife
-
Upholstery spray glue
-
Thick foam (2 inches)
-
Vinyl fabric
-
Marker or pen
Step 2 – Remove the seat.
After collecting all the tools you need, you can now start by detaching the tractor seat from its position. To remove the tractor seat, you will need to use a screwdriver. Unscrew the screws below the seat that attach it to the rest of the tractor.
You must always remember to place the screws in a safe place where you will find them later. You will need to use these same screws to screw your seat back on. Removing the seat will help make it much easier to work with the seat by giving you more working space.
Step 3 – Remove the old cover and foam.
You now need to remove the old worn-out vinyl cover from the tractor seat. You should also remove the foam that is inside the frame of the seat. It might be a bit hard to get the previously glued-on material off onto the steel frame of the seat. Nevertheless, try to get all the material off the frame to help the new glue stick on longer and better.
Step 4 – Clean the steel frame.
One cardinal rule for upholstering glue is that you must first make the surface spick and span before applying it. Doing so will help make it more abrasive and last longer. Therefore, you need to get rid of any bits and pieces of old glue or material that might still be stuck on the frame after tearing off in the previous step.
To clean the steel case well, you will need to use a damp cloth. If you decide to use any detergent on the frame, you must thoroughly wash it off before proceeding. You can also use a drill to scrape off dust and dirt from the frame.
Step 5 – Cut out the seat foam.
With the steel frame clean and spotless, you are now ready to start cutting out your foam. To cut the foam properly, place the foam on the steel frame and use a marker or pen to outline the edges. This will help to cut out the exact size accurately without making a mistake. It is especially important if you do not have extra foam or if you are working on a tight budget.
Now use an electric knife it traces the marked edges of the foam, cutting it out nice and neatly. If you don’t have an electric knife, you can also use a hot wire to cut the foam. After cutting it out, check whether it is the correct size and make any adjustments accordingly if necessary.
Step 6 – Attach the foam.
To attach the foam to the frame, you need to use upholstery spray glue. Other glues can stick the foam on but might not last as long, so; it is best to use the correct glue. Spray it on the steel frame covering the whole surface and the bottom part of the foam. If you place the foam on the frame straightaway will instantly stick on the frame. You can only do so if you are confident you will place it right the first time.
However, if you think you might need to move it around a bit first, leave the glue to dry a bit. Let it sit for at least 2 to 3 minutes, then place the foam and move it into position if you have placed it wrongly. When you are satisfied the foam is rightly placed, press it down and leave it to dry for about 15 minutes.
Step 7 – Attach the vinyl seat cover.
Estimate the approximate vinyl size by using the measurements of the foam seat. To avoid inconvenient mistakes, you can allow extra material as you cut. Use scissors to cut out the vinyl cover fabric. Spray the entire interior surface of the vinyl cover with upholstery spray adhesive. Then you must also spray the top and bottom part of the foam with glue.
Now slowly and carefully place the vinyl cover over the foam. Start to cover the top part of the seat. Make sure you have equal sizes of material left hanging on either side of the seat to make the cover immaculate and proportional.
Step 8 – Work on the seat corners
Unlike the top part that is straight and easy to glue, the sides need to be carefully folded and fastened in the metal groove. When the top part is on, work your way down to the sides, glueing on the rest of the vinyl cover. Form a neat corner fold at the corners of the seat and add glue to stick it on if necessary. Then to help the edges stay in position, slide the rubber edge cover into the metal groove to put it back.
Step 9 – Returning the seat
Now that you have changed the foam and vinyl cover of the seat, you can now attach it back onto the tractor. Use the screws you previously unscrewed to screw it back on or new ones of the same size if you wish. Remember to screw all the screws back on tightly to avoid the seat detaching during operation, endangering the operator
Important tips to note
- After cutting out the correct foam size, use it to cut out the vinyl cover as well before glueing on the foam.
- Tightly pull the vinyl cover as you place it to avoid any creases or crinkles.
- You might also need to replace the rubber edge cover if it is necessary.
Keep your reupholstered tractor seat covered.
After reupholstering your tractor seat, you need to keep the tractor in the shade or garage to help the new seat last longer. Exposing your tractor to harsh weather will simply put you in the same position you found yourself before reupholstering soon.
The scorching sun, cold wind, heavy rain, or snow will do absolutely no good to your reupholstered tractor seat. Therefore, you will need to keep it safe and away from such conditions. Make sure to do so, even if it means building a shade or simply covering it with a plastic sheet. In our last article, we described step by step process of replacing the tractor seat. We recommend you to see this detailed article.
Final words
Reupholstering your tractor seat is a simple job that requires no expert or professional hand. Within a short while, you can have your tractor seat reupholstered and looking as good as new. All you need is to follow the eight easy steps alluded above.
To make the activity interesting, you can invite friends or family to help you reupholster your tractor seat. If you like, you can even go ahead and be creative by decorating your tractor seat. Who knows, you can be reupholstering your neighbor’s seat for a few bucks next time. Now that you have all the knowledge you require, all you need is to get started.
FAQ’S
Can I reupholster a tractor seat myself, or should I hire a professional?
Reupholstering a tractor seat is a relatively simple task that can be completed by most people with basic DIY skills. However, if you’re not confident in your ability to do the job, or if you don’t have the necessary tools, it may be best to hire a professional upholsterer to do the work for you.
How do I remove the old seat cover from my tractor seat?
To remove the old seat cover, start by using a screwdriver to remove any screws or bolts holding the seat to the tractor. Once the seat is removed, use pliers to pull out any staples or tacks holding the old cover in place. Be sure to take note of the way the old cover was attached so you can replicate it when you install the new cover.
How do I install the new seat cover on my tractor seat?
To install the new seat cover, start by laying the foam padding on the seat and cutting it to size if necessary. Next, lay the upholstery fabric over the foam and pull it taut, stapling it in place around the edges of the seat. Be sure to make small cuts in the fabric to allow it to fit snugly around any corners or curves in the seat. Once the fabric is secured in place, trim any excess fabric and reattach the seat to the tractor.

Kazi Taslim
Editor
Poweredgrip ensures that an expert team of writers provides you with excellent, unbiased informational content. We are dedicated to giving you the most up-to-date and smoothest information possible. We share incomparable tips and tricks that give you awareness and confidence when making your buying decisions. Our team is enthusiastic, dedicated, and hardworking. Kazi Taslim is the editor and head of our experienced writing team.
Related Post
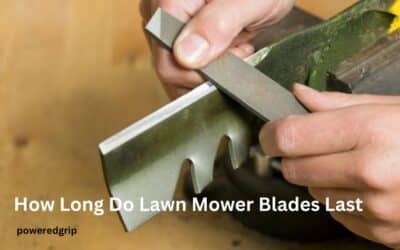
How Long Do Lawn Mower Blades Last: A Guide to Lifespan and Maintenance
Maintaining a well-manicured lawn requires using various tools; among them, a lawn mower is considered an indispensable one. However, to maintain a healthy and attractive lawn, it's important to ensure the lawn mower blades are in good condition. A dull or worn-out...

What Size Lawn Mower Blade Do I Need?
What Size Lawn Mower Blade Do I NeedLawn mowing is an essential part of lawn maintenance that helps keep your lawn healthy, tidy, and appealing. One of the most critical components of a lawn mower is its blade, which plays a crucial role in determining the quality of...

How to Change Lawn Mower Blade: A Step By Step Guide
How to Change Lawn Mower Blade Maintaining a healthy and attractive lawn requires regular lawn care and maintenance, and one of the key tools for this task is a lawn mower. However, a lawn mower's blade can become dull or damaged over time, leading to poor cutting...

How to Sharpen Lawn Mower Blades with Grinder
How to Sharpen Lawn Mower Blades with Grinder If you want to keep your lawn looking its best, it's important to have sharp lawn mower blades. Dull blades can damage your lawn, leaving it looking ragged and brown. They can also put extra strain on your lawn mower,...

How to Sharpen Lawn Mower Blades Without Removing?
How to sharpen lawn mower blades without removing?Welcome to our comprehensive guide on how to sharpen lawn mower blades without removing them. As a lawn care enthusiast, you know that maintaining your lawn mower blades is essential for a healthy lawn. Dull blades can...

15 Burning Questions Answered: Are Husqvarna Lawn Mowers Good?
If you're looking for the best lawn mowers, then you might be wondering if Husqvarna lawn mowers are good. Husqvarna has been around since 1689 and they have a reputation for making high-quality products. They offer all sorts of lawn care solutions, including...